Showing posts with label gift. Show all posts

Monday, 2 May 2016

Banana leaf papercut - now in my shop

So. Much. Papercutting. 

I'm really enjoying being so productive at the moment. I'm really happy with my latest piece, this banana leaf design:


It's also now available to buy in my shop if you want to bring some tropical decor into your home - and surely everyone wants that? 

I did a decent job of documenting stages of this piece: 

The intact outline, cut from one sheet
of black paper.
The first, lightest colour green is
added...
The reverse of the papercut which
is always a scrappy mess!


All the shades of green are added
and just need to decide on the
background.


This was pretty daunting to begin to assemble. Once I finished the outline and had to start deciphering what leaf should be what colour I had a headache for a while. But once I got stuck in it all came together. 

It was fun to take the plants I've done earlier another stage further and get involved in some detailed foliage. 

I think this would be awesome as a tessellation print...it's got me thinking about papercut patterns and some of the blackwork embroidery I did.

More on that soon.  What other plants could I do? Thoughts?

Monday, 11 April 2016

Pot plant papercut

I did another papercutting this weekend and although halfway through I felt like I was going insane I am so so pleased with how this turned out! 


This piece reminds me a lot of Jean Jacques Rousseau, He was one of my favourite artists growing up. I love all the stylised foliage in his jungle pictures. Apparently he spent a long time in botanical gardens painting different exotic plants which he later used in his paintings (that from a essay I wrote for my IB art class..). 


I especially like that this piece depicts our actual plants on our actual window sill. Most of my papercuts are pulled from my imagination so it was nice to do something different. 

But man, I could really tell that this was a new direction...I must have gone through 10 blades cutting this piece. That window pane was a killer. I'm glad I stuck at it as the lines of the panes work really well with the organic shapes of the plants. 

I'm excited to do more of these but for now this one is now available in my shop


Saturday, 9 April 2016

Deer papercut - now in shop

So I finally did a new papercut! It's been ages as I have been busy with my quilt. I have had some plans rattling around in my head for a while and haven't really been able to get them out...


This isn't the actual project I had in mind but as it is a departure from my usual style and process for papercutting I just wanted to do a quick project to test the water. 

I actually did most of this piece one Sunday evening so it was fast which was really satisfying. 

The black outline approach is new for me...it does add a layer (haha) of complexity but I do like the way it looks like stained glass. 


Here's how it came together:


1. I used a white pen to sketch the
outline of the image and then cut out
the lines..
2. The finished outline - this is all cut
from a single piece of black craft
paper.


3. I started building up the colours inside
the outlines. I started with the foreground
- flowers, deer and worked backwards. 
4. Building up the various layers to
create the background and sense of
depth.


And...done! I like how it turned out and it was fun to try a new style. I also feel like I have a better idea of how to take forward a bigger project that I am trying work out. Although probably more smaller projects like this are in order before I dive into that so keep posted... 

This piece is now available for sale in my Etsy shop

Sunday, 27 March 2016

Catching up on Christmas crafts

It's Easter Sunday and after my my last mammoth post on finishing my quilt I figured I needed to catch up on some of the other stuff I have done since. 

It feels a bit untimely but oh well. 

This past Christmas was the first one that James and I spent on our own. Aside from the initial panic of having to do a Christmas dinner, which turned out awesome in the end, it was really great to have total freedom to do what we wanted when we wanted. 


We got up unpleasantly early to get our lamb shoulder in the slow cooker. 

We more or less followed this recipe - I stuck the shoulder with anchovies, garlic and rosemary and it turned out really great, the gravy was especially good. 


We rewarded ourselves for our early start with some bucks fizz with freshly squeezed orange juice and champagne. 

Check out our vintage juicer - I love it. 


This was our Christmas tree - bigger again than last year but due to all the felt ornaments I made last year it was pretty full. 

It did need some bigger ornaments though so I took some inspiration from a xmas decoration given to me by a friend a few years ago. 


These hearts were quick, easy and I really liked how they turned out, they looked great on the tree too. 

I cut out 2 heart shapes from some felt, used a basic backstitch to embroider a snowflake in a contrasting colour with embroidery floss on one of the hearts, used another colour for a blanket stitch to sew the hearts together, leaving a small hole to stuff the ornament so its a little plump, and then blanket stitched the hole closed.

I finished then up with some floss as a hanging loop adding a few sequins for decoration. I'll be making more of these for sure. 


Elephant baby quilt - done!

I have finished my quilt! 

It was a LOT of work but it went really well and I got it to it's intended baby before he was more than a few month old so that was a result. 

I didn't blog about all the steps in between where I left off and the finished piece - I was all focussed on just getting it done. The previous posts on my quilt progress are here: part 1, part 2, and part 3.

So, the elephants are done and stitched to the quilt top and next I moved on to the balloons. I decided on 3 different red fabrics for them, and decided on an arrangement that worked with the position of the elephants and sun. As with all the other elements of the quilt I first drew and cut the shapes on to tracing paper and then fusible web. I then used the tracing paper templates to cut out the balloons from the three red fabrics - I prepared the appliqué balloons the same way as the sun - turning in a 1/4 inch seam allowance around the edges of the shape. 

Once these were done I was able to assemble the quilt and adjust placement of all the elements:


And then blind stitch/applique them all down on to the quilt top - it was a good feeling to finally have all these bits and bobs come together into one unit.

So after that, I employed some very basic embroidery to work in the elephants tails and the strings of the balloons.

I used chain stitch for the balloon strings and most of the elephants tail and satin stitch for the end of the tail.

I really have no experience in embroidery but I liked doing this and how these bits turned out.


So at this point I had a finished quilt top. Awesome. 

Next up, putting it all together. I knew my backing was going to be this great blue and white polka dot, but I wasn't sure on the binding... I was thinking about red or yellow but they seemed too close to the balloons and sun so I decided to bind the quilt with the backing fabric. 

2
1


3
4


1. To make the quilt 'sandwich' you need enough floor space to lay the quilt flat. I laid the quilt backing, right side down, on the floor smoothing out any wrinkles. Then I laid the quilt batting on top - getting this positioned and flat can be tricky, batting is sort of clingy. 

2. Next the quilt top goes down - face up. You can see that the batting is cut slightly bigger - I find it easier to do this and then trim it down to size. 

3. I used a few pins to secure the 3 layers together. I find it best to start in the middle and work out toward the edges, smoothing it all flat as you go. I folded over the edges and clipped them together.

4. Finally, I used a basting stitch, starting at the middle and working toward the edge in straight lines and then again in increasing concentric circles. This is a sort of annoying and time consuming task but it is really worth it. It makes it much easier to work with the quilt all the layers are well fixed and not slithering about. 

SO THEN...actual quilting...finally. I don't really have any pictures of this as its hard to photograph but basically I used small running stitches in matching colours (yellow for sun, red for the balloons etc) to outline the different applique elements. 


The sky and grass had some large areas which needed some additional quilting to keep the layers together so I added some quilted clouds in the sky and some scattered flowers in the grass. 


Once all the quilting was done it was time to do the binding. I trimmed the quilt top and batting to 1 inch less than the backing fabric. I folded over the excess backing fabric twice, first fold with the raw backing edge against the edge of the topper and backing, then over again on the quilt top. 

I used the much more detailed instructions over on the super helpful tutorial on cluck cluck sew.


I added a last minute label to the back of the quilt - my name and date I finished the quilt. I guess this is a thing that's done? It's a good idea. 

And it's done! After a final wash in the machine (on gentle). 

I'm really pleased with it. And so was my friend, the baby seemed indifferent. 

This was a pretty all consuming project for a while and sort of bumped all other crafting and papercutting out of the picture for a while. I did manage a few other projects since then so more on those next...

Sunday, 27 September 2015

Making a baby quilt - Elephant ears and eyes (part 3)

More progress on the quilt - I'm in the middle of a couple of fiddly bits on the elephants to sore them out. Ears and eyes. 

First and also undocumented (oops, sorry) I stitched all the pieces of the elephants together with invisible stitch - so the elephants are a now a single unit rather than a head, body and bunch of legs.

Ears, much like the other pieces are based on a paper template, fusible web and turning in the cut edges. I then pinned this to the elephant and stitched together:


On to the eyes. Embroidery - arg. I have embroidery thread from old cross-stitch endeavours, but really I am just winging this and basing what I need to do on stuff that my Mum taught me when I was a kid. 

So the eye. I used a basic satin stitch for the white and black of the eye and outlined with a running stitch. It's not my forte at all, but luckily this turned out ok, I think. 


I'm chuffed with this - they look cute. I like how they are taking form. 


Next is the balloons - I would have had more on this but I forgot to wash the fabric - and I'm a grown up now and know this isn't a stage you miss (see here). But happy with the result so far!

Making a baby quilt - Appliqué sun (part 2)

I mentioned my first steps of my baby quilt in my last post, here.

I made some good progress this weekend, luckily as the baby was due last Friday - luckily the baby is shy and hanging on and buying me some time (thanks baby!).

When I left off I had done most of the elephants - folding in the edges of the various pieces they are comprised of and securing with fusible web. 

Next I tackled the sun. I wanted this placed in the top left corner - I find it helpful to have the quilt topper out so I can test composition options:


I used a conveniently yellow piece of scrap paper to check size and placement. 

Also at this point I was looking at different options for binding - the red at the bottom was considered and then discarded. I have other plans for red. 

Back to the sun - when I tried this I decided that I wanted a spikey (?) sun rather than a smooth round one. Nice. Much more work!


1
2
3


4


1. I used the paper template to trace a circle of fusible web and yellow fabric with a 1/4 in seam allowance. Two points to note here - first, the little 'v's nicked out of the seam is a good trick to help turn in a round seam. Second, I folded the template circle into eighths to give the width of each of the sun-rays (spikes!)

2. Folding in the seam allowance bit by bit and pressing as I go to secure with the fusible web.

3. All edges folded in and secure, on the reverse side.

4. Right side up - main bit of the sun done!

5
6


5. For the spikes/rays I cut out a triangle template with the edges of the same witdth of the folded template in picture 1. I cut out eight triangles of fusible web, and eight triangles of yellow fabric (with a 1/4 inch seam allowance). I placed the triangle of fusible web in the centre of the fabric, nipped the corners off to help with the folding in, and pressed in each edge of the eight triangles. 

6. I pinned each of the triangles to the circle and stitched together with invisible stitch. 

Sun: Done. 


Sunday, 20 September 2015

Making a baby quilt - Appliqué and elephants (part 1)

One of my best friends is having a baby very soon (too soon, quilt-wise) and I am making a baby quilt for her. 

Years ago when the first of my friends got pregnant I decided to do the same thing and made my first quilt. I think I sort of understood the basic principle (a batting sandwich) but it was a pretty challenging experience - and as I chose to do the whole thing by hand, lengthy too.

But it turned out pretty well in the end and my friend was really chuffed. 


Anyway, that was over 6 years ago and I have no idea how I got from the pile of material stage to the one above. It involved appliqué...lots of invisible stitch...and a bit of luck?!

Well, I'm doing it again and this time I will try to document the process better. 

I knew I wanted to do something similar to my first one. I really like how fun and bright the quilts look. I figure they are more likely to be used as a playmat or even a wall hanging so I wanted to do a fun scene. This time with elephants. 

With all projects I start with a small sketch, just to see if what I have in my head makes sense in terms of composition and proportion.


I drew the sort of shape I wanted the elephant to be - then tried to place it on the quilt, at which point I thought I wanted to add a baby elephant and a sun and some balloons to balance it out.

I'd like to pretend that there was a little more technical planning at this stage but nope, those scribbles are about it!

I had some fabric left over from the first quilt but needed a load more so I got to head over to the fabric shop. I live in south London and this is my closest go-to haberdasher. 


So I stocked up - lots of patterns - maybe too many? Er. Oh well. 

Also useful to document the other equipment I'll need for this project. 

- self healing mat 
- rotary cutter
- sewing scissors
- tape measure
- pins
- various thread
- washable vanishing marker
- wax
- craft paper
- pencil
- fusible web


I'll also use my sewing machine although the vast majority of this will be hand sewn. 


So the first thing I did was wash all the fabrics. This is exactly the sort of boring-but-really-important step I would have tried to skip out of when I was a kid. It's tedious and I'm usually raring to get going with my project and really resent this delay. 

But I'm older and wiser now and although its still tedious it really is a must for any quilt project - you have to wash the quilt at the end and how devastating if you have colour run or shrinkage? 

So wash the fabric first. You'll never regret it. 


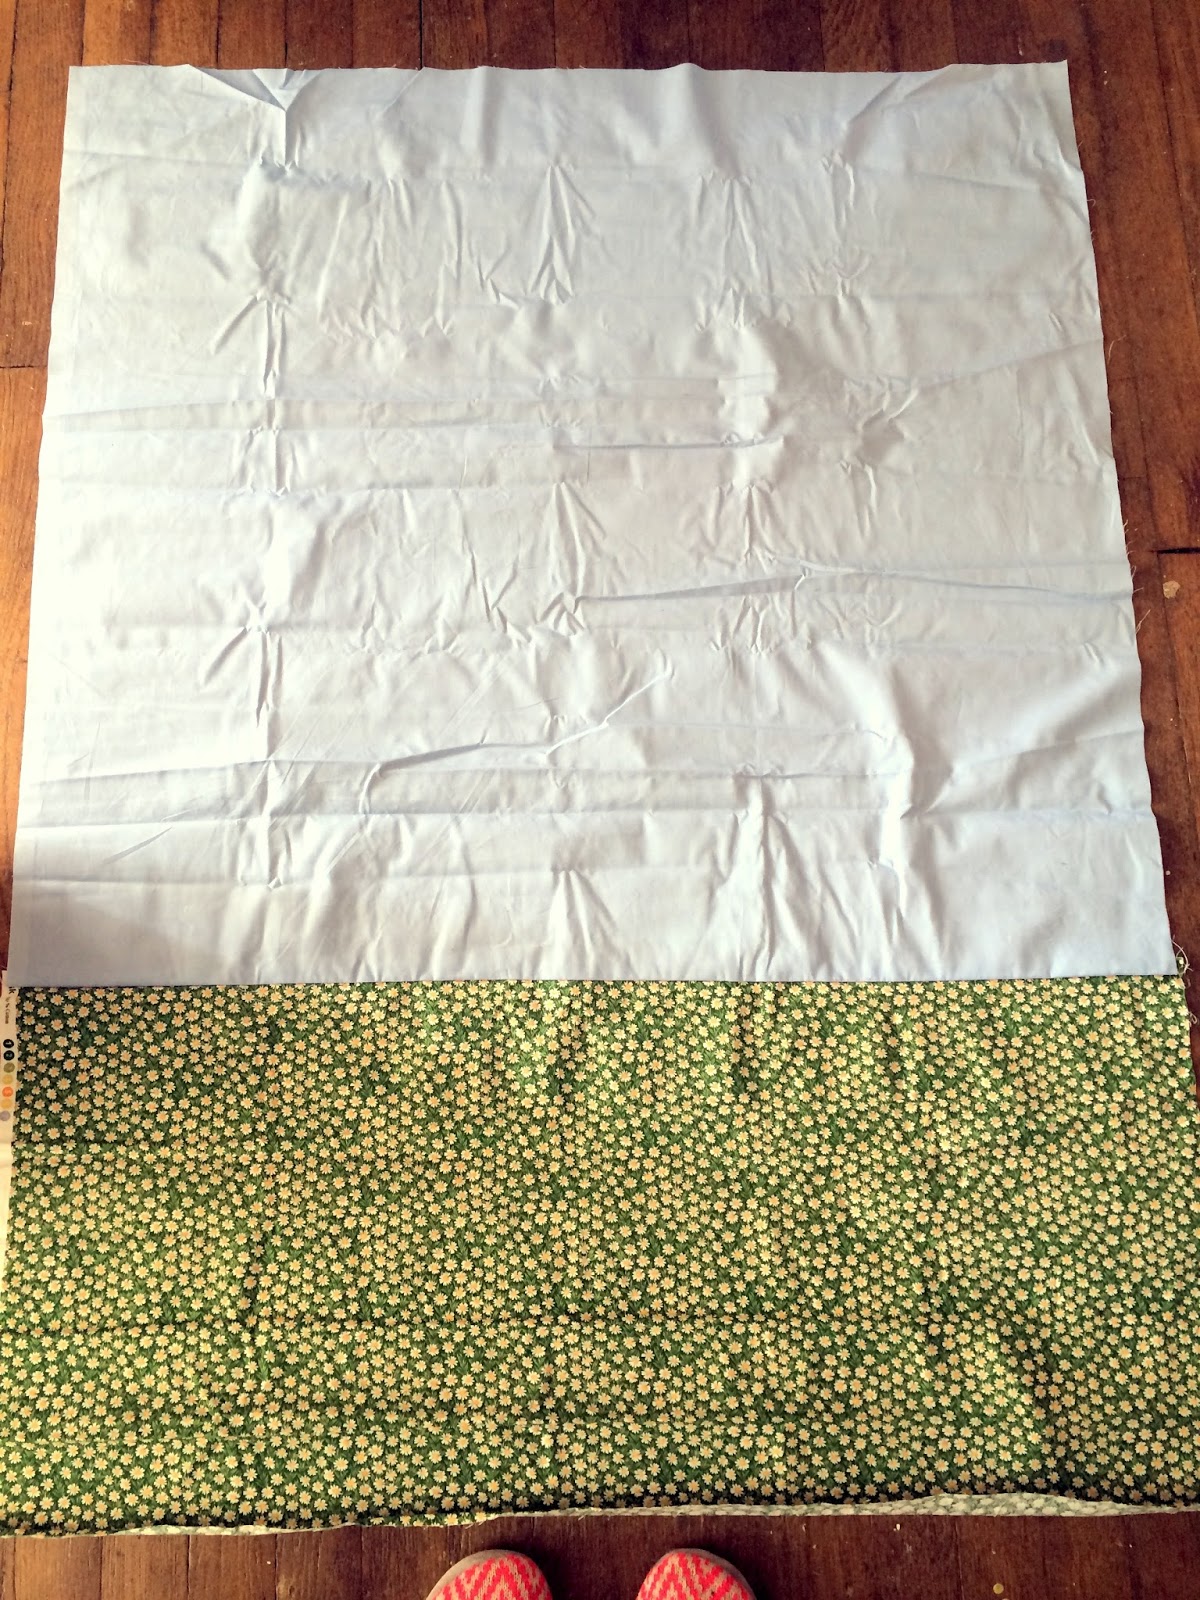
My quilt is going to be about 120cm x 85cm. This will maybe shift a bit with trimming and eventual binding. The first thing I did was to piece the quilt top. This was quite simple, 2 pieces: the blue sky and the green with daisies. I ran this across on the sewing machine. 


Next up I tackled the elephant. There are 2 options here. You could cut the whole elephant shape from one piece (easier) or the elephant would be made up of different sections (legs, head, body) - this is more fiddly but I prefer the way it looks - it gives more detail and 3-dimensionality to the elephant. 


So to do this I first drew the elephant out, in the size i wanted it for the quilt, on craft paper. I cut out the different pieces.


Then I arranged these on the fabric. Make sure you think about the eventual orientation - I wanted my elephant facing right so here have places the right orientation on the right side of the fabric - but you could of course flip the templates over and place them on the wrong side of the fabric - the latter may be preferable if you are marking up with pencil and don't want this visible on the right side of the fabric. 


So here you can see that I used vanishing marker to mark about 1/2 inch around each piece of the template. This will eventually be folded in on the finished appliqué. 

One additional step here which isn't essential and I stupidly forgot to photograph is the use of fusible webbing. This does help with the folding in of the edges and eventual positioning on the quilt top. The fusible web should be cut out  the same size as each elephant piece (ie, without the seam allowance of the fabric)


Below is step by step of prepping a piece of the elephant, in this case a leg.. 


At the top of the picture you can see the paper template - this is the size and shape we are aiming for with the final piece. 

In this picture you can see I have the piece of fusible webbing in the centre of the piece of fabric. 

I have folded over the left hand side of the fabric (over lapping the fusible web) and pressed it in place with an iron. The web then 'sticks' this in place. 

(NB. You can see that I have trimmed the bottom right corner with a diagonal - this makes it easier to fold in and less lumpy as there is less fabric folded in) 

I then placed the template back on the piece to check the next fold. I lined up the left edge of the template and left pressed fold of the fabric.  

Then, as shown, I folded up the bottom of the fabric pressing it with my fingers and keeping it in line with the bottom of the template.


I then carefully slid out the template and used the tip of a warm iron to press the fold down and stick down with the fusible webbing.


I repeated this for the next 2 sides until all edges of the piece have been folded in and secured with the fusible web. 

This shows the right side of the leg and another one that I completed. They should be the same size as the paper templates. 

This stage can be a bit fussy, especially with small pieces like this but the folding in of the raw edges is important to avoid fraying on the final piece. 


I repeated the above with all the elephant pieces for the big and little elephant. I could then lay these out on the quilt top to see how they looked:


Not great pictures but you get the idea. It's nice to see it all coming together. More progress on this soon!