Showing posts with label decorating. Show all posts

Sunday, 10 April 2016

DIY terracotta plant pots

I have always loved plants. When I was a kid I used to save up my pocket money to buy African violets...very rock and roll of me, I know. 

Since we moved to London I have been slowly accumulating a new family of house plants and a couple of years in, some of them are in need of re-potting....which was a good excuse to do a DIY I had in mind for plain terracotta pots.


Pots are annoyingly expensive and most of the time not what I really want anyway. I really like terracotta but it does get a bit same-y if you have a lot of plants in one room.

I picked up a few different sizes of pots from my local hardware store. They were only a couple of quid each. I also got 2 pots of gloss paint in magnolia and turquoise - look for little 'small project' or tester pots to save money unless you have other projects in mind for the rest of the pot.


Stuff I needed: pots, masking tape (I actually used packing tape as I didn't have masking tape to hand which was fine but masking is probably better), brushes, white spirit and gloss paint.

I just wanted to try something simple so decided to try one colour block type-pot and one drip...


So for the drip one...


1
2


3


I upended a pot and started by painting the base and slowly easing the paint towards the edge until it began to form drips and trickle down the sides of the pot. 

I think in retrospect I could have thinned the paint down a bit. I was quite thick and when it dried it went a bit crinkly. I don't really mind it though and James just described it as looking 'organic'. Fine. 


For the colour block one I taped off the base of the pot and painted the upper half. I also painted the inner inch and a half or so in the pot... I just think this gives it a more finished look but its down to personal preference.

I left it to dry for a few hours and then peeled off the masking (packing) tape. Very satisfying.

1
2


3
4


They aren't perfect but I think they turned out well and unlike some other projects I have done, I don't mind the imperfections.

I really like the colour block ones - I'll be doing more of them for sure. And maybe something with more stripes or zig zags? I'll need to pick up some masking tape for that!

I think my plants look pretty happy with their new homes.


Saturday, 9 April 2016

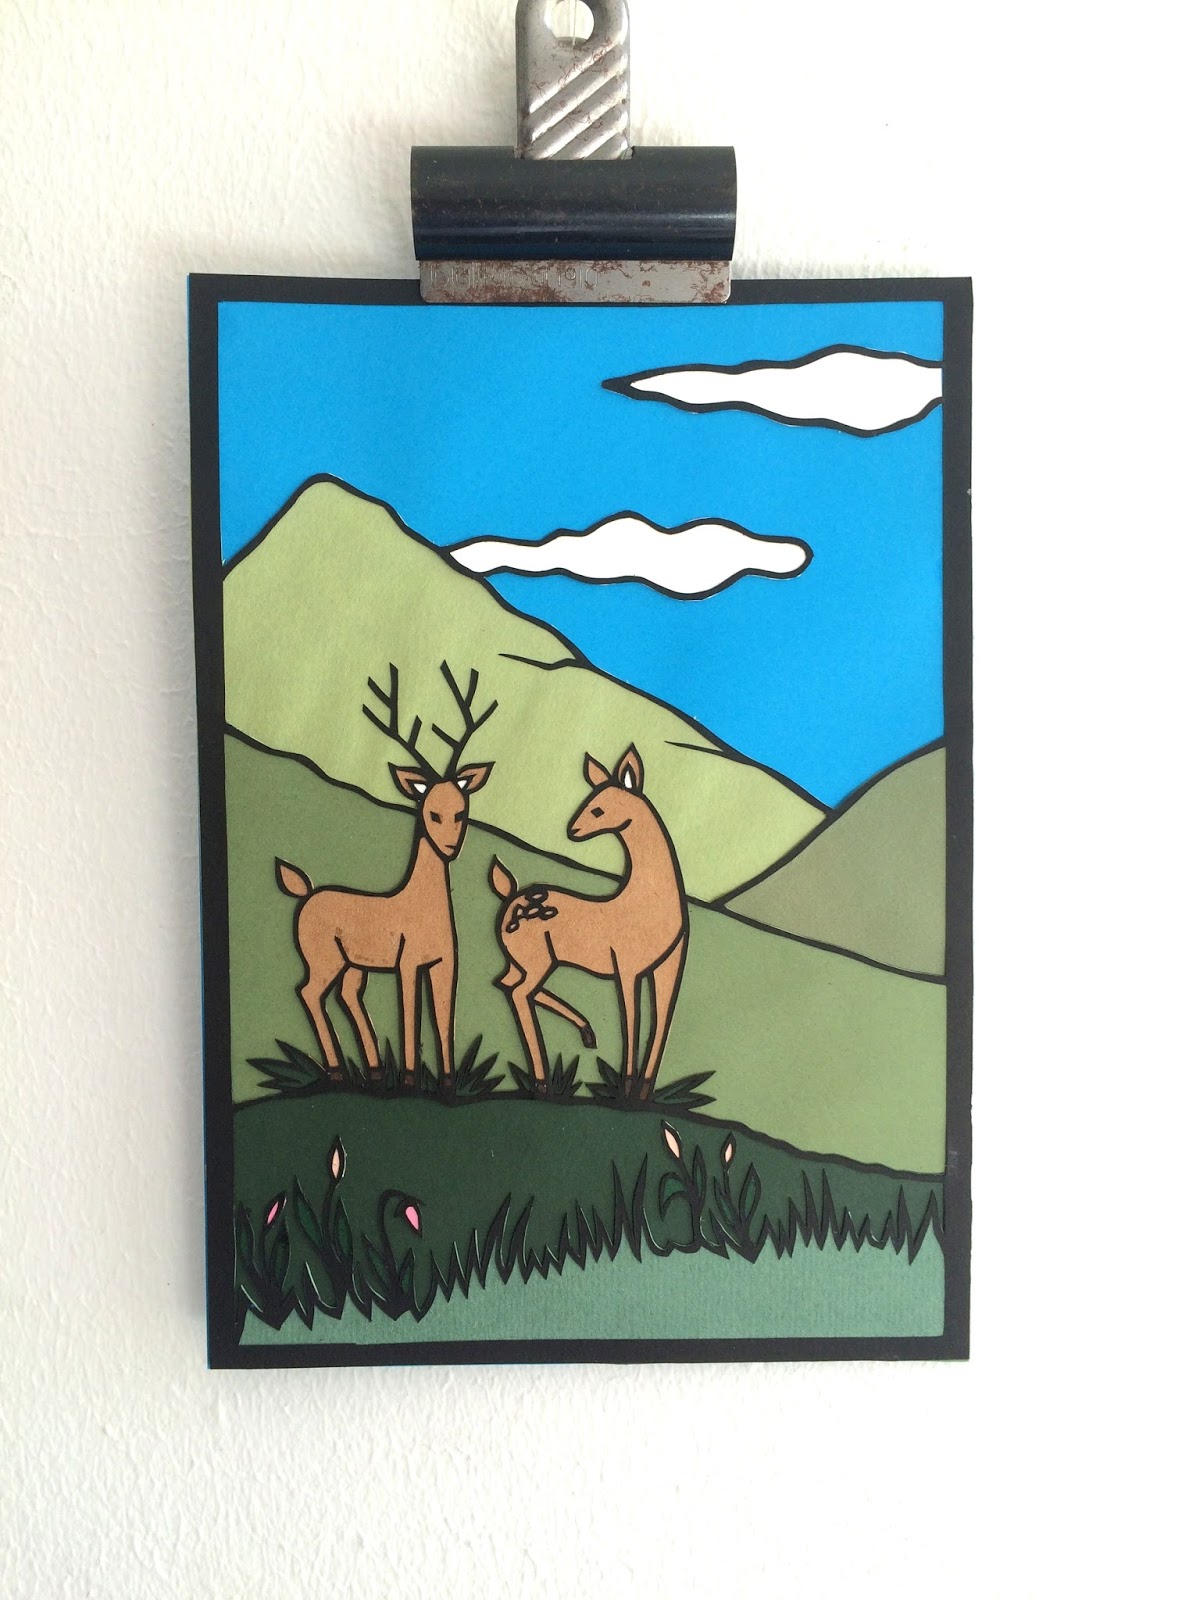
Deer papercut - now in shop

So I finally did a new papercut! It's been ages as I have been busy with my quilt. I have had some plans rattling around in my head for a while and haven't really been able to get them out...


This isn't the actual project I had in mind but as it is a departure from my usual style and process for papercutting I just wanted to do a quick project to test the water. 

I actually did most of this piece one Sunday evening so it was fast which was really satisfying. 

The black outline approach is new for me...it does add a layer (haha) of complexity but I do like the way it looks like stained glass. 


Here's how it came together:


1. I used a white pen to sketch the
outline of the image and then cut out
the lines..
2. The finished outline - this is all cut
from a single piece of black craft
paper.


3. I started building up the colours inside
the outlines. I started with the foreground
- flowers, deer and worked backwards. 
4. Building up the various layers to
create the background and sense of
depth.


And...done! I like how it turned out and it was fun to try a new style. I also feel like I have a better idea of how to take forward a bigger project that I am trying work out. Although probably more smaller projects like this are in order before I dive into that so keep posted... 

This piece is now available for sale in my Etsy shop

Saturday, 2 April 2016

Some good stuff I saw recently..

I've noticed some good stuff about at the moment and thought I'd share...


- A papercutting competition! If like me you’ve fallen off the wagon and need to dust off your scalpel and get back on.. check it out here.

- Last episode of Fresh Meat (Channel 4 here in the UK). This show was so great and the last episode was brilliant... I'm literally going to start re-watching the whole thing immediately. If you haven't seen it, do.

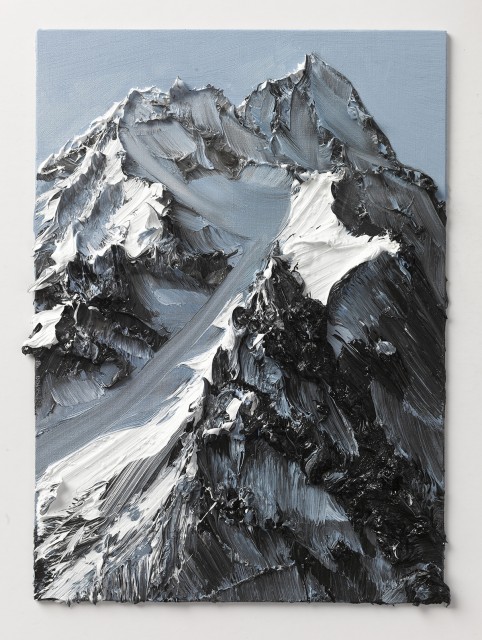
- This amazing work from Conrad Jon Godly. How stunning? Credit to Danielle Krysa @ The Jealous Curator for bringing to my attention. Reminds me of my love of Kyfin Williams and my own forays into oil painting.

- I just discovered Marimekko design. I am going to have to use some restraint in not buying all the plates, they are great. 

Enjoy!


Sunday, 27 September 2015

Making a baby quilt - Elephant ears and eyes (part 3)

More progress on the quilt - I'm in the middle of a couple of fiddly bits on the elephants to sore them out. Ears and eyes. 

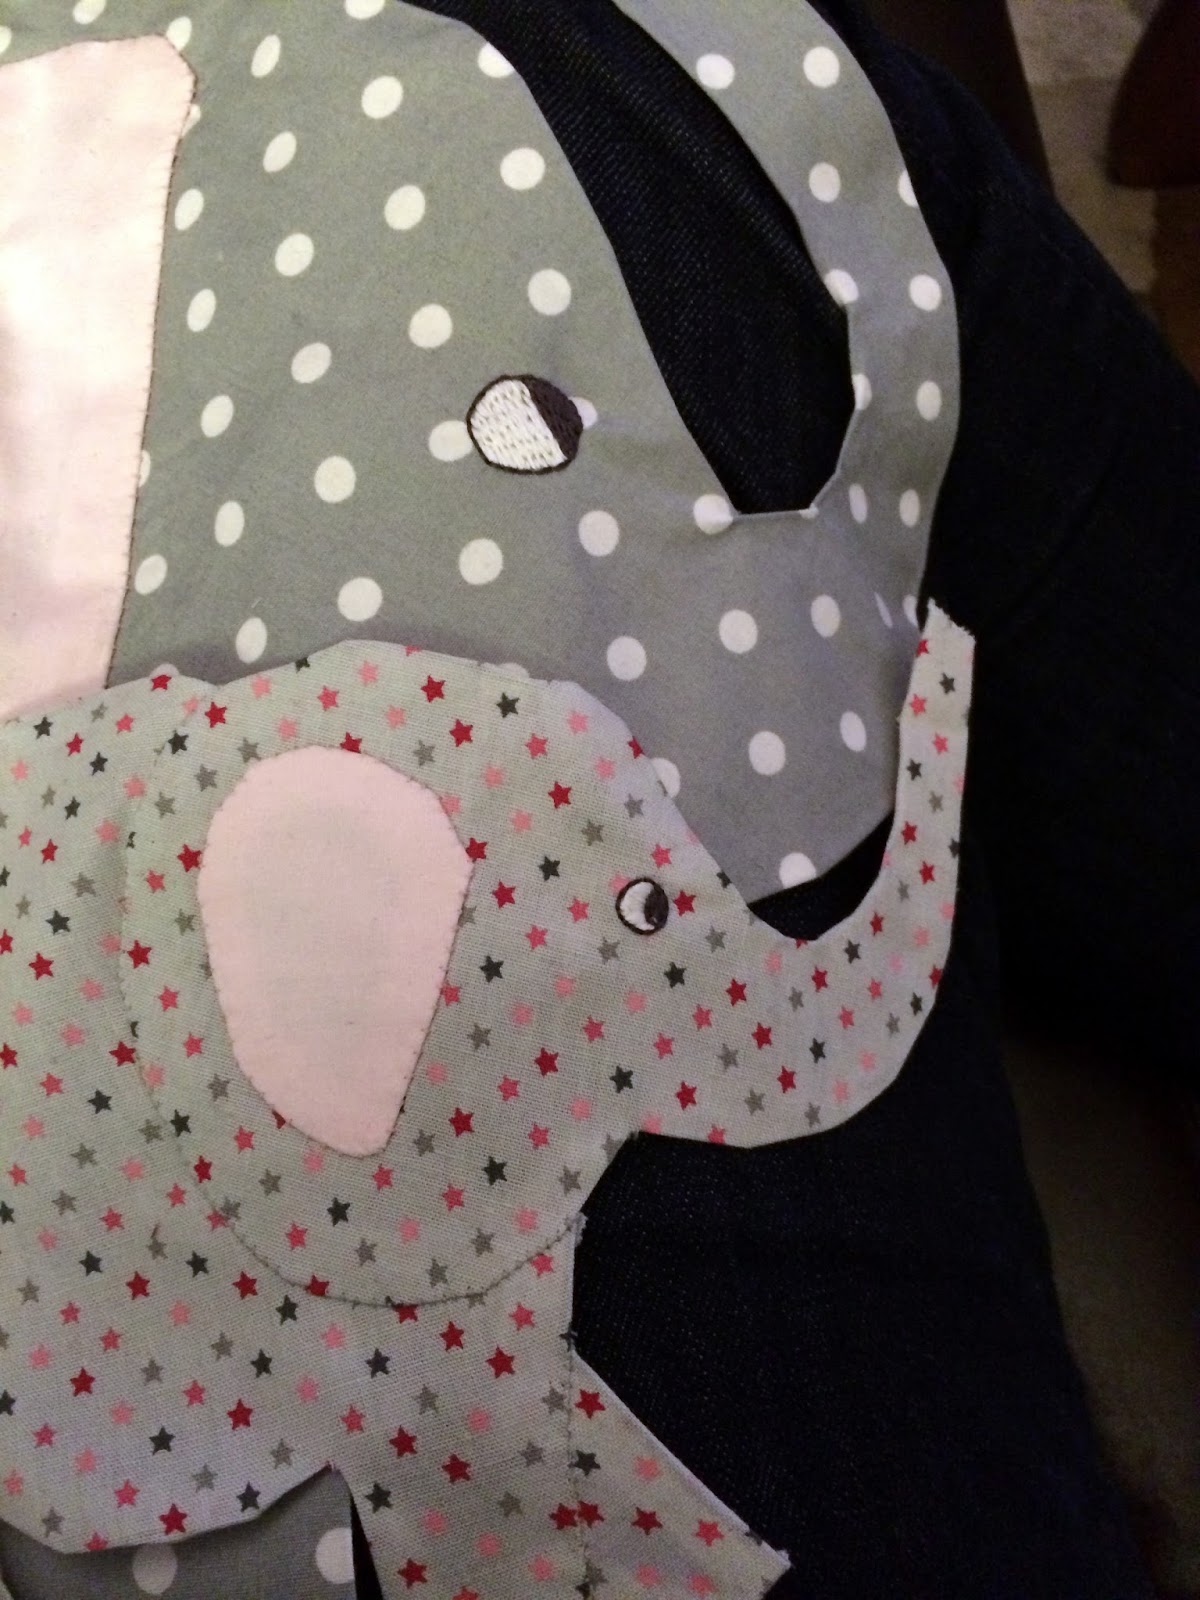
First and also undocumented (oops, sorry) I stitched all the pieces of the elephants together with invisible stitch - so the elephants are a now a single unit rather than a head, body and bunch of legs.

Ears, much like the other pieces are based on a paper template, fusible web and turning in the cut edges. I then pinned this to the elephant and stitched together:


On to the eyes. Embroidery - arg. I have embroidery thread from old cross-stitch endeavours, but really I am just winging this and basing what I need to do on stuff that my Mum taught me when I was a kid. 

So the eye. I used a basic satin stitch for the white and black of the eye and outlined with a running stitch. It's not my forte at all, but luckily this turned out ok, I think. 


I'm chuffed with this - they look cute. I like how they are taking form. 


Next is the balloons - I would have had more on this but I forgot to wash the fabric - and I'm a grown up now and know this isn't a stage you miss (see here). But happy with the result so far!

Sunday, 30 August 2015

DIY - Hanging a massive print

I am in the middle of a massive post about my quilt project but in the interim I thought I'd mention this DIY I did this bank holiday weekend.


We bought this great old Dutch (?) map when we were living in Crystal Palace last year. As far I can tell it's a map of textile and petro-chemical industry over Europe - just what every home needs! Anyway, it's great and we love it but its about 1m x 1.5m and quite heavy paper and displaying it is a bit of a challenge.

We moved house about a year ago and I'm ashamed to say that this has just been rolled up in the spare room while I figured out how to hang it. I'd ruled out conventional framing as it would cost a fortune and make it difficult to transport. I had seen the hanging systems of basically a rod at the top and bottom to weigh it/stretch it out and wanted to have a go at doing something similar myself. 


So to do this I needed the following:

- 2 lengths of wood measuring 110cm each (I wanted a small amount of overhang as the map is 103cm)
- matt varnish and brush) 
- small hooks
- 4 bulldog clips
- picture wire

(side note: buying the wood was a full on nightmare here in London. I have no idea why. Numerous DIY shops either didn't have wooden dowels or lengths of wood over a metre. I finally bought 2 mop handles and a saw to saw them down to size!)


1. So the first thing I did was saw my bits of wood to size and sand down any ragged edges. If you are luckier than me in terms of suppliers of bits of wood in your local area maybe you can skip this bit. (On the up-side I now have a saw which makes me feel very capable.)

2. Next, varnish the wood. I just used a matt varnish so the wood didn't look so raw. But you could use a stain if you wanted the wood a specific colour or finish. Make sure you wait for it to dry. 

3. Figure out where you want the bulldog clips - I wanted them right on the edge of the map to minimise the corner curls. Once the clips are in position line up the holes with where the hooks will need to be on the wood and make a little mark. Do this for both the top and bottom pole.

4. Screw in the hooks. I used a hammer and a small nail to start off the hole and make sure that the hook would screw in straight. 


5. I screwed 2 eyelets onto the opposite side of the pole to the hooks to attach the picture wire to the top pole. I kept the wire fairly tight as the poster is so big but it can be made more slack to adjust the distance from the nail/hook.


6. Finally, hook the hooks through the holes in the bulldog clips. The good thing about this is if your hooks aren't perfectly placed you can shift the clips up and down to adjust them. I hung the top pole with the map attached and finally hung the bottom pole off the bottom clips. 

Done!

I'm really pleased with how this turned out. And best of all once I had got all the stuff together it only took a couple of hours to finish. 

I'd recommend this as an easy, cheap way to display a large piece like this. Just bear in mind the weight of the paper - this is very heavy duty. I'd worry about a thin piece possibly perishing under the weight of the bottom pole. 

I'm happy that this map is finally out of its packaging and on display.

Now back to the quilt....more on that soon.